Following this tradition, we will write a Hello World program as an Apio app. Apio apps are made up of Apio interfaces and connect system outputs such as a web service, database, a file on the local file system or on a remote SFTP server, and so on. Therefore, there are many different ways to create such a payload. We decided to go crazy and come up with many different examples, ranging from simple to complex, of a Hello World program built in Apio.
One way is just to send the “Hello World” payload to the Apio dashboard, based on a cron input step, setting a value and sending the value to the Apio dashboard.
Before writing our first Hello World program we have to understand the basic constraints of our “language”.
An Apio app will run one or more interfaces, these interface declarations will define a data flow.
Despite the appearance of the editor’s user interface, Apio is a flow based programming environment and not a procedural one. Handling large amounts of data requires extra measures, so when reading the interface please think about data flow instead of step-by-step execution.
Flow based programming defines data flowing through the system instead of program steps or communicating objects. The data comes from an input step, then in our simplified model moves through a predefined path, being split into smaller packages by a pagination step or enriched by database queries or HTTP requests. Every step in our interface is a concurrently running program that’s constantly checking its input. When something appears on the input, it processes it and sends the result to the connected next step. This means that many things occur at the same time, the incoming packets will be concurrently processed by the steps, but the order of packets will stay the same.
Let’s refer to the data that’s travelling through the system as a “package”. Packages have a fixed internal structure, to make handling information easier. Every package has an identifier, like 1697d15c0c87d45e:1697da5d354d0f87, that will be displayed on the dashboard’s event list and can be used to find specific events at any time. Packages have a payload section with an undefined format that can be an array of values, or just a single value. Because of this freedom and the intricacies of the system every package contains a Header with the same format and a set structure of maps, indexed by string values that can be more reliable.
Here is an example of a packet, rendered as JSON:
The fixed Header format is helpful when working with packets as it allows us to add new items and access values without having to check the format of a packet ahead of time.
For example, a Javascript step will be able to access the random_numbers header field, and create a new field:
Once this Javascript step has been executed, the package will have a new field “double”:
First, we create an app and add a new interface into the app:

By clicking on the newly created interface’s name, we start editing the interface declaration:
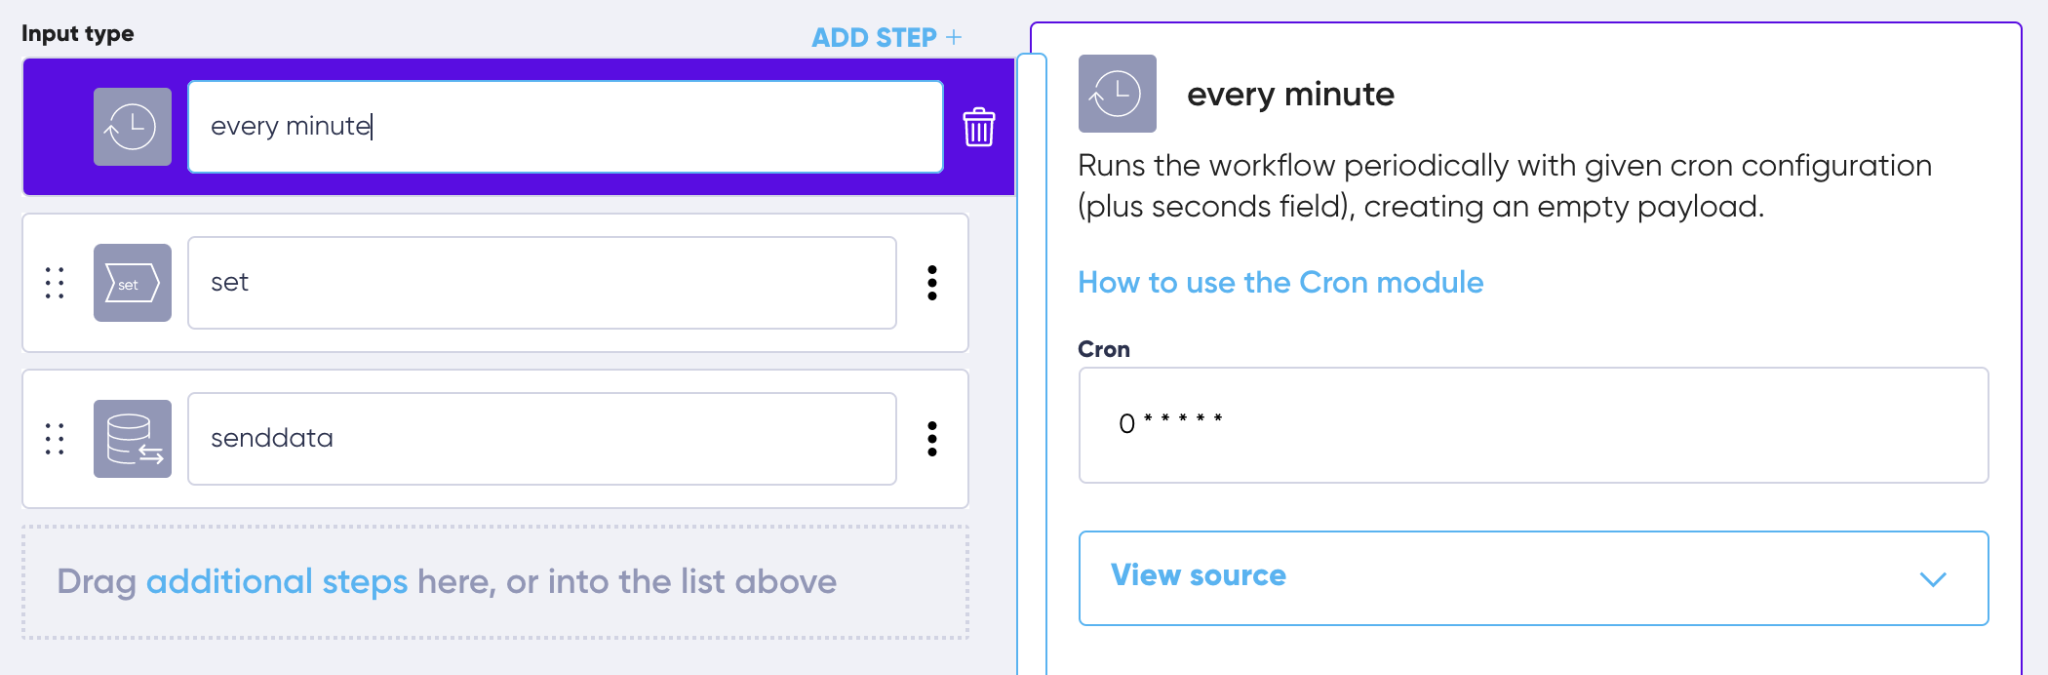


Although this last step is not really necessary, as the set step will already send the packet to the dashboard server.


In this next example, let’s replace the cron input with a HTTP Listen. When the app is run, the HTTP listen step will create an HTTP endpoint (web server listening on the given port) that we can then call (using a browser, Postman or curl for example). Once the endpoint is called, it will create a packet using the configuration from the input’s parser.

On most systems running the app on port 80 is hard (sub-1024 port range requires admin permission) so we run the service on port 8888.
Testing is simple, we visit the url http://localhost:8888/test from a browser. This will run our Hello World app, generating an entry on the dashboard.
Let’s answer with “Hello World” to the request! To be able to respond to a HTTP request, we have to create a Response (Sync In) point in the input. This will keep the connection open for the duration of the Timeout setting, waiting for a Response step’s answer.

Let’s add a Response step to our interface:

We are setting the status to 200 (that’s HTTP OK), Content will be the output. We use the same name (answer) as the handle, this will be deprecated soon.
When calling this endpoint from the browser, the HTTP Listen input will generate an empty packet and keep listening on the response channel, the Set step will set the payload, then the Response step will send back a message to the input. The input will send the response to the browser: ”Hello World”. In the meantime the Send Data step will send the usual message to the dashboard. These events will happen at the same time, that’s just the magic of concurrent processing.
We can also return a value using template tags:

One of the most powerful steps is Javascript. It has limited Javascript capabilities, so ES5 features are missing, but it has a version of underscore.js built in.

Or to show how to set payload and how to use underscore.js:

When reading from a folder, files have to be freshly written, but not too fresh, otherwise we will read them before they have been written completely. File input step has a 10 seconds grace period, after that, new files will be picked up from the location.

Note that we are still using the “none” parser, meaning that the file content will be used as-is. We don’t need file formats for Hello World.
After reading, the files will be moved to the Archive folder, if defined. If not, they will be deleted. Errors folder will be used by the parser, but none parser will not produce any errors. We can use the Response step with a 400 code to indicate an error to the File Input step, files will be moved from the Archive to the Errors folder in this case.
When checking external APIs or simply grabbing content from a website, HTTP Poll Input is one way to avoid extra steps (we could also use cron input + HTTP step).

To have something to poll we could use any website, but let’s run a small go based web server that outputs “Hello World” on http://localhost:8888/ address. (optional)
There are many different ways to write a Hello World program in Apio. In this post we went through some of the many different methods that Apio Apps can be used and how easy they are to configure, edit, and run.
We showed you how to write a Hello World program using:
These are just a few ways to get you started, but there are many more. This is based on the fact that Apio apps are run as small microservices without any additional installation or dependencies . Any modifications done to an App once it is running can be applied using over the air upgrades that relaunch the service with the latest changes. To summarise, Apio apps are extremely versatile, easy to use, run and modify and can be used to create both simple and complex programs.
If you want to test these out or start writing your own Hello World apps on Apio, set up your account and get started… and if you want to share what you’ve done with the Apio team, just send us an email at hello@getapio.com.
Photo by Alex Knight on Unsplash
Ready to start?
Watch our launch webinar to see all the core features of Apio.
Watch Launch Webinar